Friday, October 9, 2015

I knitted plaid!

Plaid blankets have always appealed to me.  Most knitting patterns for plaids have you knit horizontal stripes, then you have to do something special to get the verticals, like duplicate stitch, or a crocheted chain on top of the stripes, which is ok but seems like a lot of trouble for an approximation that doesn't quite have the tartan look.  Here's a link to a free vintage plaid scarf pattern done with a crocheted chain for the vertical stripes for comparison - you only get skinny vertical stripes.

Back in 2005, Vogue Knitting published a scarf pattern by designer Annie Modesitt with a clever construction that really gives the look of a tartan plaid.  I just repeated the design four times across to make my throw.

Tartan plaids are made with a twill weave, so you see the two colors crossing each other in little diagonal stripes - Here's an example of a twill-weave plaid from Wikipedia -
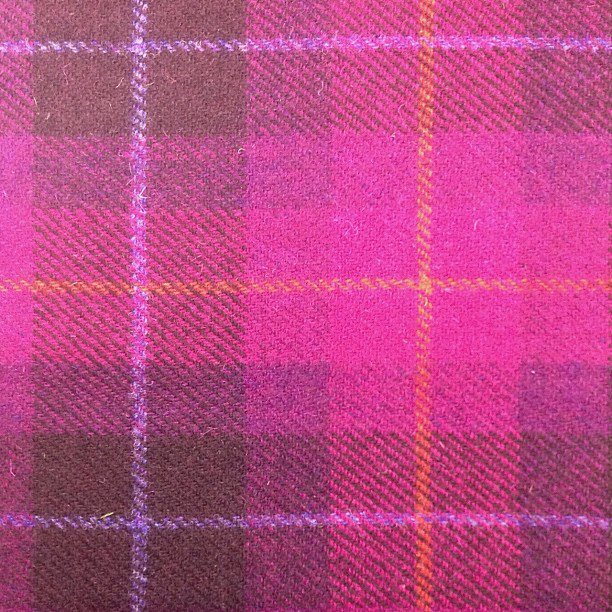

Annie's knitted version gives dots of knit stitches instead of diagonals, but the mix of colors works like the woven plaid.  (My closeup photo to show the knitting is upside down.)


Annie's method involves knitting the odd rows across in intarsia columns - with my 5 colors in 4 repeats, that's 20 ends of yarn.  I tried using large bobbins which was a failure - documented in my Ravelry project file.  In the end I used embroidery floss bobbins and had to work in a lot of ends since you can't put a lot of worsted weight wool on a bobbin designed for thread.  (I wove them in as I went.)  This is what the back of the knitting looked like with the bobbins across the top.

The horizontal stripes are worked by knitting each even row in the same direction as the previous odd row using just one color for those rows, alternating between knit and slipped stitches. 

When this project came off the knitting needles, it was curled up and lumpy, but that didn't stop Lu from testing it out as soon as I spread it on the floor to have a look.


Here are a couple more photos of the throw, on the bed in the guest room which is what I made it for.

The gray yarn I used has a hint of metallic sparkle that doesn't show in my photos.  The other yarns are plain wool.
 Although this took only about two and half months from start to finish, I'm glad to move on to smaller projects for a change.

Monday, October 5, 2015

A decorator special

When we refurnished the living room, we moved the Asian rug that went with the old furniture to our bedroom.  Although the existing quilt's colors were not terrible with it, the patterns of quilt and rug together were too busy and incompatible.  In addition, the sun had taken its toll on the quilt's fabrics in one corner - they were fading and some were starting to shred.  I was not immediately inspired as to how I would replace it, but a local fiber-related flea market supplied a color-themed decorator fabric sample book in our brown and blue-green scheme.  I dismantled the book and was able to cut two 2.5 x 5 inch strips of each fabric which I pieced in a single stripe. 

This obviously left a lot of area to be filled. Knowing this quilt is likely going to fall apart from sun exposure, I didn't really want to spend a lot of time on the problem, and decided to quilt rows of feather motifs.  Feathers fill a lot of space quickly - though the structure I put them in maybe isn't so fast.


The 9.5 inch interlocking circles design is a composite of ideas from one of the longarm feathers tutorial books I learned from when I first started my quilting business.  The alternate design - a half-clam shell 3.75 inches across - came from a striped printed fabric I noted while fabric shopping on-line several years ago.

The decorator fabrics are of varying weights and textures - you can see a textured chenille under the leaf print in this next photo.


I hoped my design would not take weeks and weeks to finish, but it took longer than it should have.  I loaded the quilt with what is the left side first, so the stripes go the length of the longarm table.  I basted the top edge, then decided to nail the pieced strip with its varying weights and textures (including some devilish slippery fabrics) firmly in place making sure it was very straight before doing any other quilting.  I was thinking, "Oh, it's only the second full roll of the quilt, I don't really have to baste all that, do I?"  Well, I should have been checking as I worked my way back to the leading edge, because I quilted in about 2 inches of backing fabric as pleats - and since I was working backwards, I did not see it until I had quilted an entire row of circles and feathers, a row of half-clams and feathers, and finally a row of interlocking circles that all had to be ripped out.

This quilt was really not planned very well at all.  I thought I would use the feathered cable that borders the pieced stripe throughout the quilt, but the feather spine template I was using was not designed for cables and quilting the four lines of the cables with it it was so tedious I really wanted to give it up after doing the first stripe with it - but I had invested in it and was pretty tired of ripping out quilting by that point - so just one more cabled row sets off the pieced area.

Here's another photo of the pieced stripe.


 Happily, my lack of planning somehow resulted in the same 1.5 inches of border on the final edge, to balance with the same width I had filled with angled straight lines on the first edge.

We used to have a textured rug and patterned quilt - now we have a textured quilt and patterned rug.


I hope the natural colored sateen fabric will last a little longer than the printed fabrics of the old quilt - but maybe five years from now, I'll have a different idea to try.